Shooting Rollei Infrared 400 on a Mamiya 645 Pro
I've been experimenting with infrared photography for some time, but shooting Rollei Infrared 400 on the Mamiya 645 Pro adds another layer of unpredictability to the process.
Digital infrared photography gives you the reassurance of seeing the result immediately. With infrared film, there is no such luxury. You meter the scene, calculate the exposure, attach the infrared filter and hope that what eventually comes back on the negative bears some resemblance to what you imagined.
On this particular day, that uncertainty was about to become rather important.
I took the Mamiya 645 Pro into a local woodland with a roll of Rollei Infrared 400, looking for the combination of summer foliage and light that can make black-and-white infrared photography so distinctive.
It was also another step in getting to know the Mamiya properly. I'm still refining the way I use the camera, and this roll exposed a few weaknesses in both the camera setup and, as it turned out, the photographer.
A note about the photographs
The three photographs in this article are presented completely uncropped. Apart from converting the camera-scanned negatives using Negative Lab Pro, no editing has been done.
I haven't adjusted the exposure, contrast, highlights or shadows, and I haven't tried to correct the results to make them look more successful than they were.
That's deliberate.
This was an experiment with Rollei Infrared 400 and the Mamiya 645 Pro, including some significant exposure mistakes, and I think there's more value in showing the results as they are rather than polishing them afterwards.
Why Rollei Infrared 400?
Rollei Infrared 400 is an interesting film because it can be used as a conventional black-and-white film, but its extended sensitivity into the infrared spectrum allows a very different look when used with an infrared filter.
For woodland photography, that's particularly attractive.
Healthy green vegetation can become extremely pale, sometimes almost white, while tree trunks, branches and other objects remain considerably darker. The familiar tones of a woodland are rearranged.
That's really what interests me about infrared photography. I'm not particularly interested in using it simply as an effect. I like the way it can take an ordinary landscape and make it feel subtly unfamiliar.
The woodland I photographed that day is somewhere I already knew. In spring, parts of it are covered in bluebells. Later in the year, the woodland floor becomes dominated by ferns.
Infrared turns those ferns into something else entirely.
Shooting Infrared Film with the Mamiya 645 Pro
The camera was my Mamiya 645 Pro fitted with the Sekor C 80mm f/2.8 N lens.
Using an infrared filter meant that some of the exposures became very long. One of the first photographs of the day involved a calculated exposure of around six minutes.
That makes the whole process rather deliberate.
I would find the composition first, focus and frame without the infrared filter, meter the scene, calculate the adjusted exposure and then attach the filter before making the photograph.
At least, that was the theory.
The Mamiya's power winder had other ideas and managed to fire a couple of frames before I intended it to. I've experienced the same problem previously and have since become increasingly convinced that replacing the power winder with a manual crank would suit the way I use this camera much better.
The cable-release adaptor was another frustration. It isn't simply a conventional threaded cable release, and I found the small adaptor rather too keen to fall out of the camera.
None of this is disastrous, but with only 15 exposures on a roll of 645 film, accidentally wasting frames is particularly annoying.
There is another side to that limitation, though.
Once I realised how few photographs I had left, I became considerably more selective. Instead of photographing everything that looked vaguely promising, I started asking whether a composition was actually worth one of the remaining frames.
That's one of the things I'm increasingly enjoying about returning to film photography.
Limitations can be surprisingly liberating.
An Old Oak and a Carpet of Infrared Ferns
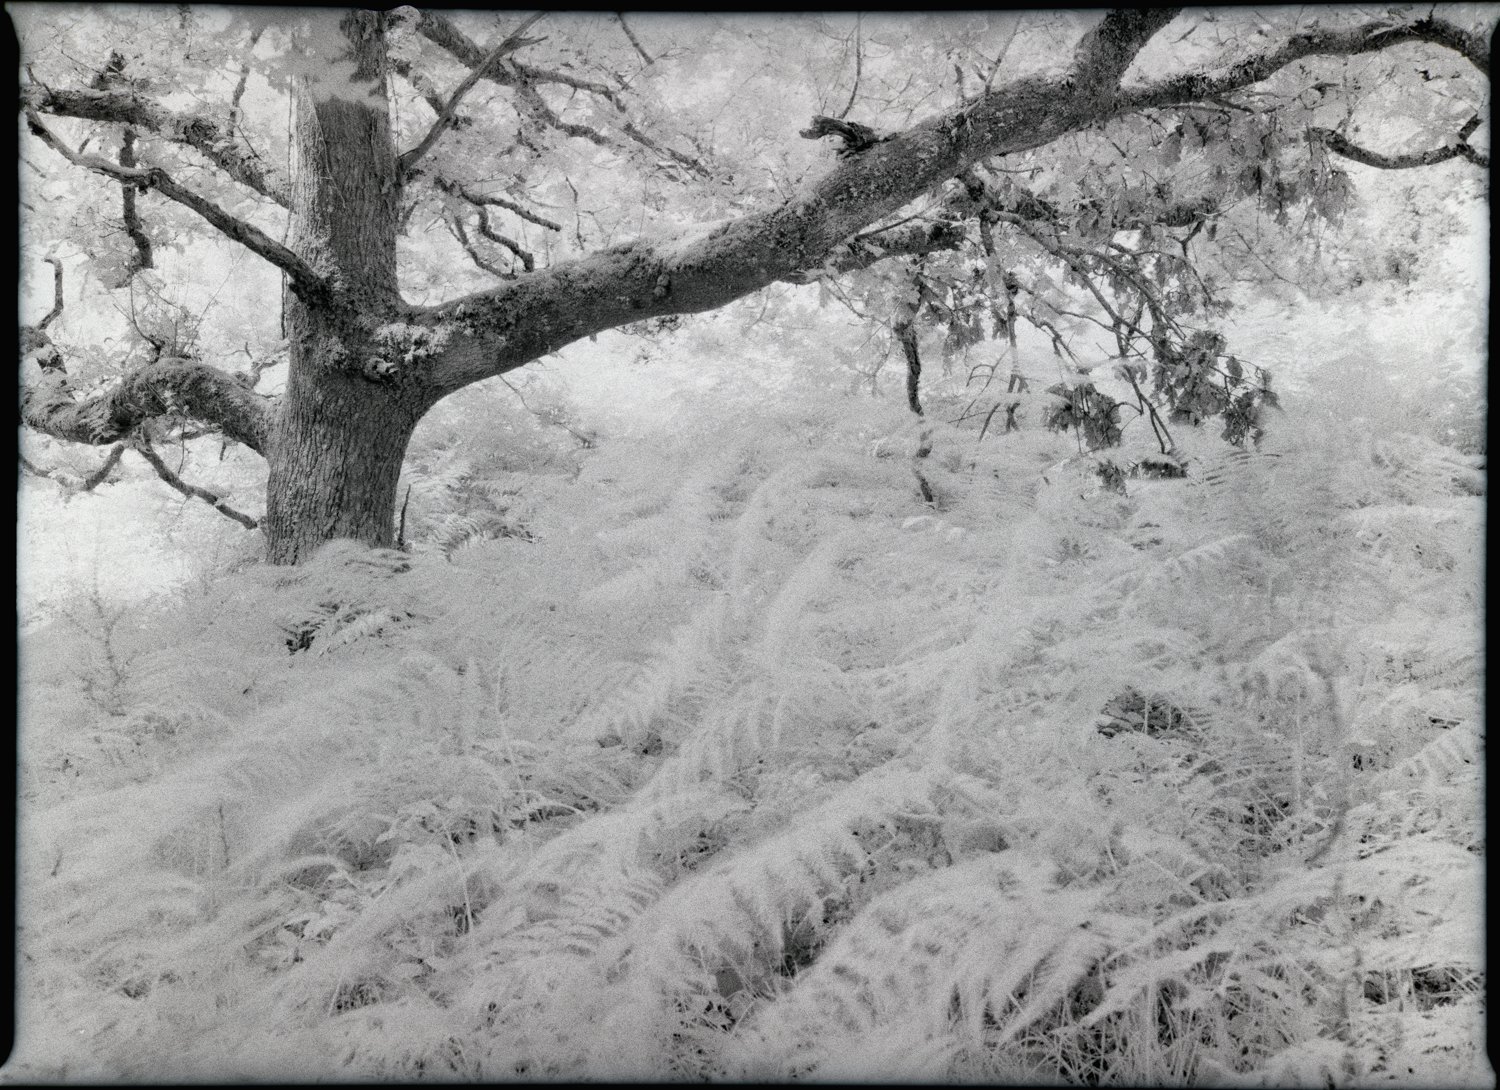
This became one of my favourite photographs from the roll.
It's actually a fairly simple woodland composition. What initially attracted me was the old oak tree on the left of the frame. Its trunk provides a strong anchor before the enormous branch reaches almost completely across the photograph.
Below it is a carpet of ferns.
This is where Rollei Infrared 400 completely changes the appearance of the scene. The green foliage has become extraordinarily pale, giving the ferns an almost luminous quality, while the bark of the oak remains comparatively dark and heavily textured.
I particularly like that contrast.
There is a lot of fine, delicate detail beneath this enormous, heavy structure formed by the tree and its branch. Although there's actually quite a lot happening within the frame, the shape of the oak seems to contain everything beneath it.
It is an old tree and a woodland floor full of ferns, but infrared has shifted it just far enough away from reality to make it feel slightly otherworldly.
That's exactly what I was hoping for when I started experimenting with infrared film.
A Path into the Darkness
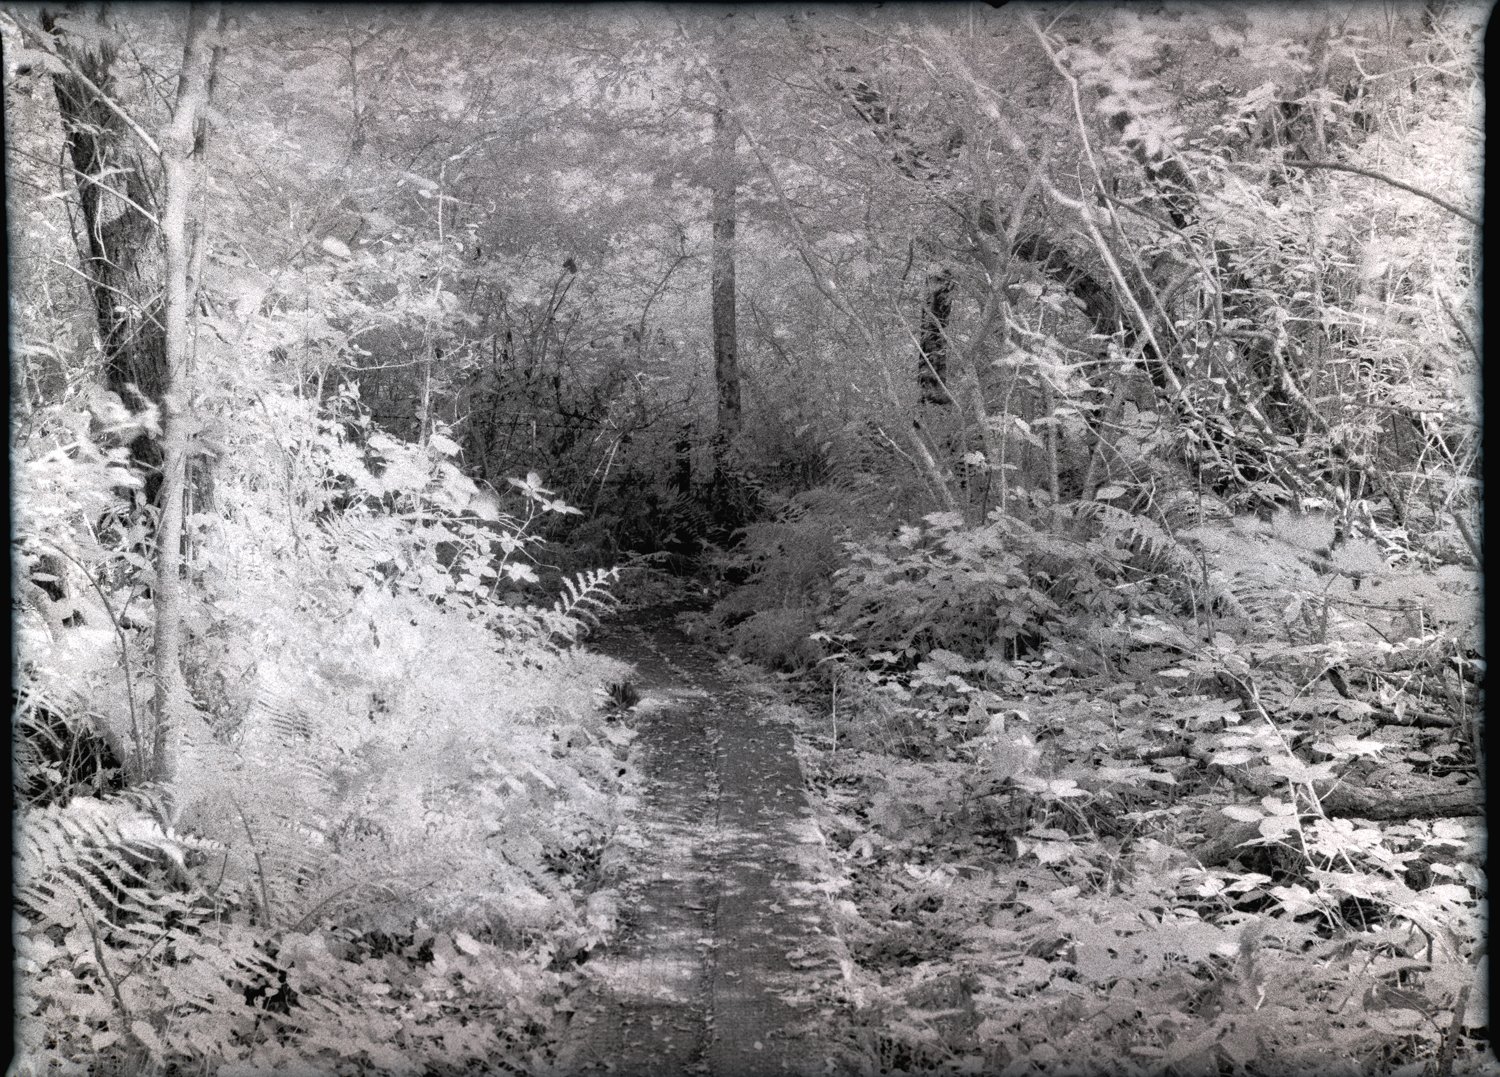
The second photograph is rather different.
The pathway immediately provides structure, drawing the eye from the bottom of the photograph towards the darker central area.
What I particularly like is that the destination isn't light.
Landscape photographs quite often use a path to lead towards brightness — an opening in the trees, sunlight or some obvious point of visual resolution. Here the path disappears into diffused darkness.
I don't find that darkness threatening. If anything, it gives the photograph a sense of quiet and depth.
I've subsequently experimented with tighter crops of this photograph because I felt some of the elements towards the left were distracting from that central region.
For this article, however, I've deliberately shown the complete frame.
I think it's useful to see exactly what was recorded on the negative rather than only the version I might eventually choose to print or put into a portfolio.
Letting the Infrared Effect Take Over
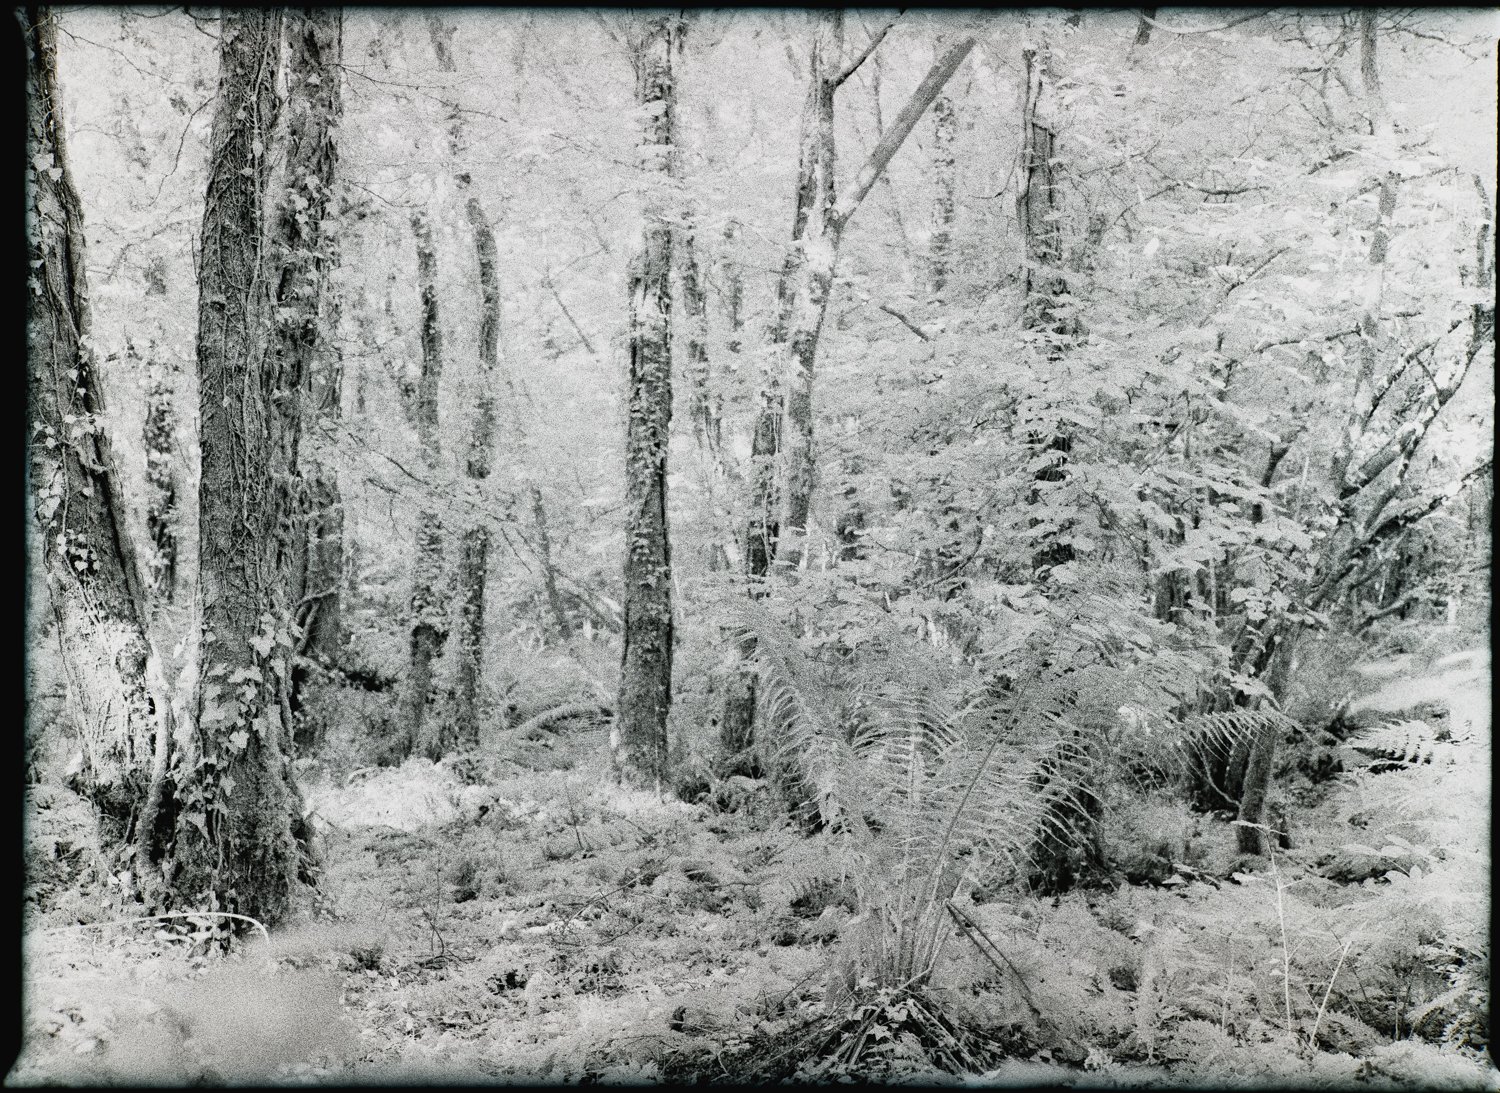
The third photograph is perhaps the most extreme example of what happened on this roll.
The infrared rendering has pushed much of the vegetation towards white, leaving the darker trunks and branches to provide much of the structure.
It's considerably less conventional than the path photograph.
There is very little separation between some of the foliage and the brighter areas of the frame, but I find myself rather liking the effect. Instead of a conventional woodland photograph, it has become something much more impressionistic.
And that brings me to the rather important discovery I made when the negatives finally arrived back.
I Got the Exposure Wrong
I waited almost six weeks to get these negatives back.
When I finally looked at them, the problem was immediately obvious.
I'd massively overexposed a number of the photographs.
My long-exposure calculations had gone wrong.
There is a moment in the accompanying video where I recall my maths teacher calling me a moron. Looking at some of these negatives, I began to think he might have had a point.
But something unexpected happened.
I actually liked some of the overexposed photographs.
The mistake had pushed the infrared effect much further than I'd intended. Tonality became compressed, vegetation became extraordinarily bright and some of the photographs acquired an almost dreamlike appearance.
It wasn't what I'd planned, and I wouldn't pretend otherwise.
But it was interesting.
So rather than simply dismissing the affected frames as failures, I want to understand what happened and see whether I can reproduce some of those characteristics deliberately on another roll — while correcting the underlying exposure calculations.
That's also why I haven't attempted to rescue these photographs in Lightroom.
Apart from their conversion in Negative Lab Pro, what you're looking at here hasn't been edited. These are the results of the experiment, mistakes included.
What I Learned from Shooting Rollei Infrared 400
This roll probably taught me more than one where every exposure had been perfect.
I'm becoming more comfortable with the Mamiya 645 Pro, but I'm also gradually configuring it around the way I actually photograph. The power winder doesn't particularly suit me, and the cable-release arrangement needs improving.
I'm also learning how Rollei Infrared 400 behaves in woodland and, importantly, how I need to approach longer infrared exposures.
But the biggest lesson was probably not to automatically reject a technically incorrect photograph.
Overexposure changed these negatives. In some cases it probably ruined them. In others, it produced something I hadn't anticipated and rather like.
The next step isn't simply to avoid making the same mistake.
It's to work out why I like the mistake and whether I can make it deliberately.
That's a much more interesting place to continue from.
Watch the Video
In the video below I take the Mamiya 645 Pro and Rollei Infrared 400 into the woodland, work through the compositions and exposure calculations, attempt my first infrared-film self-portrait and eventually discover what went wrong when the negatives return almost six weeks later.
0 Comments